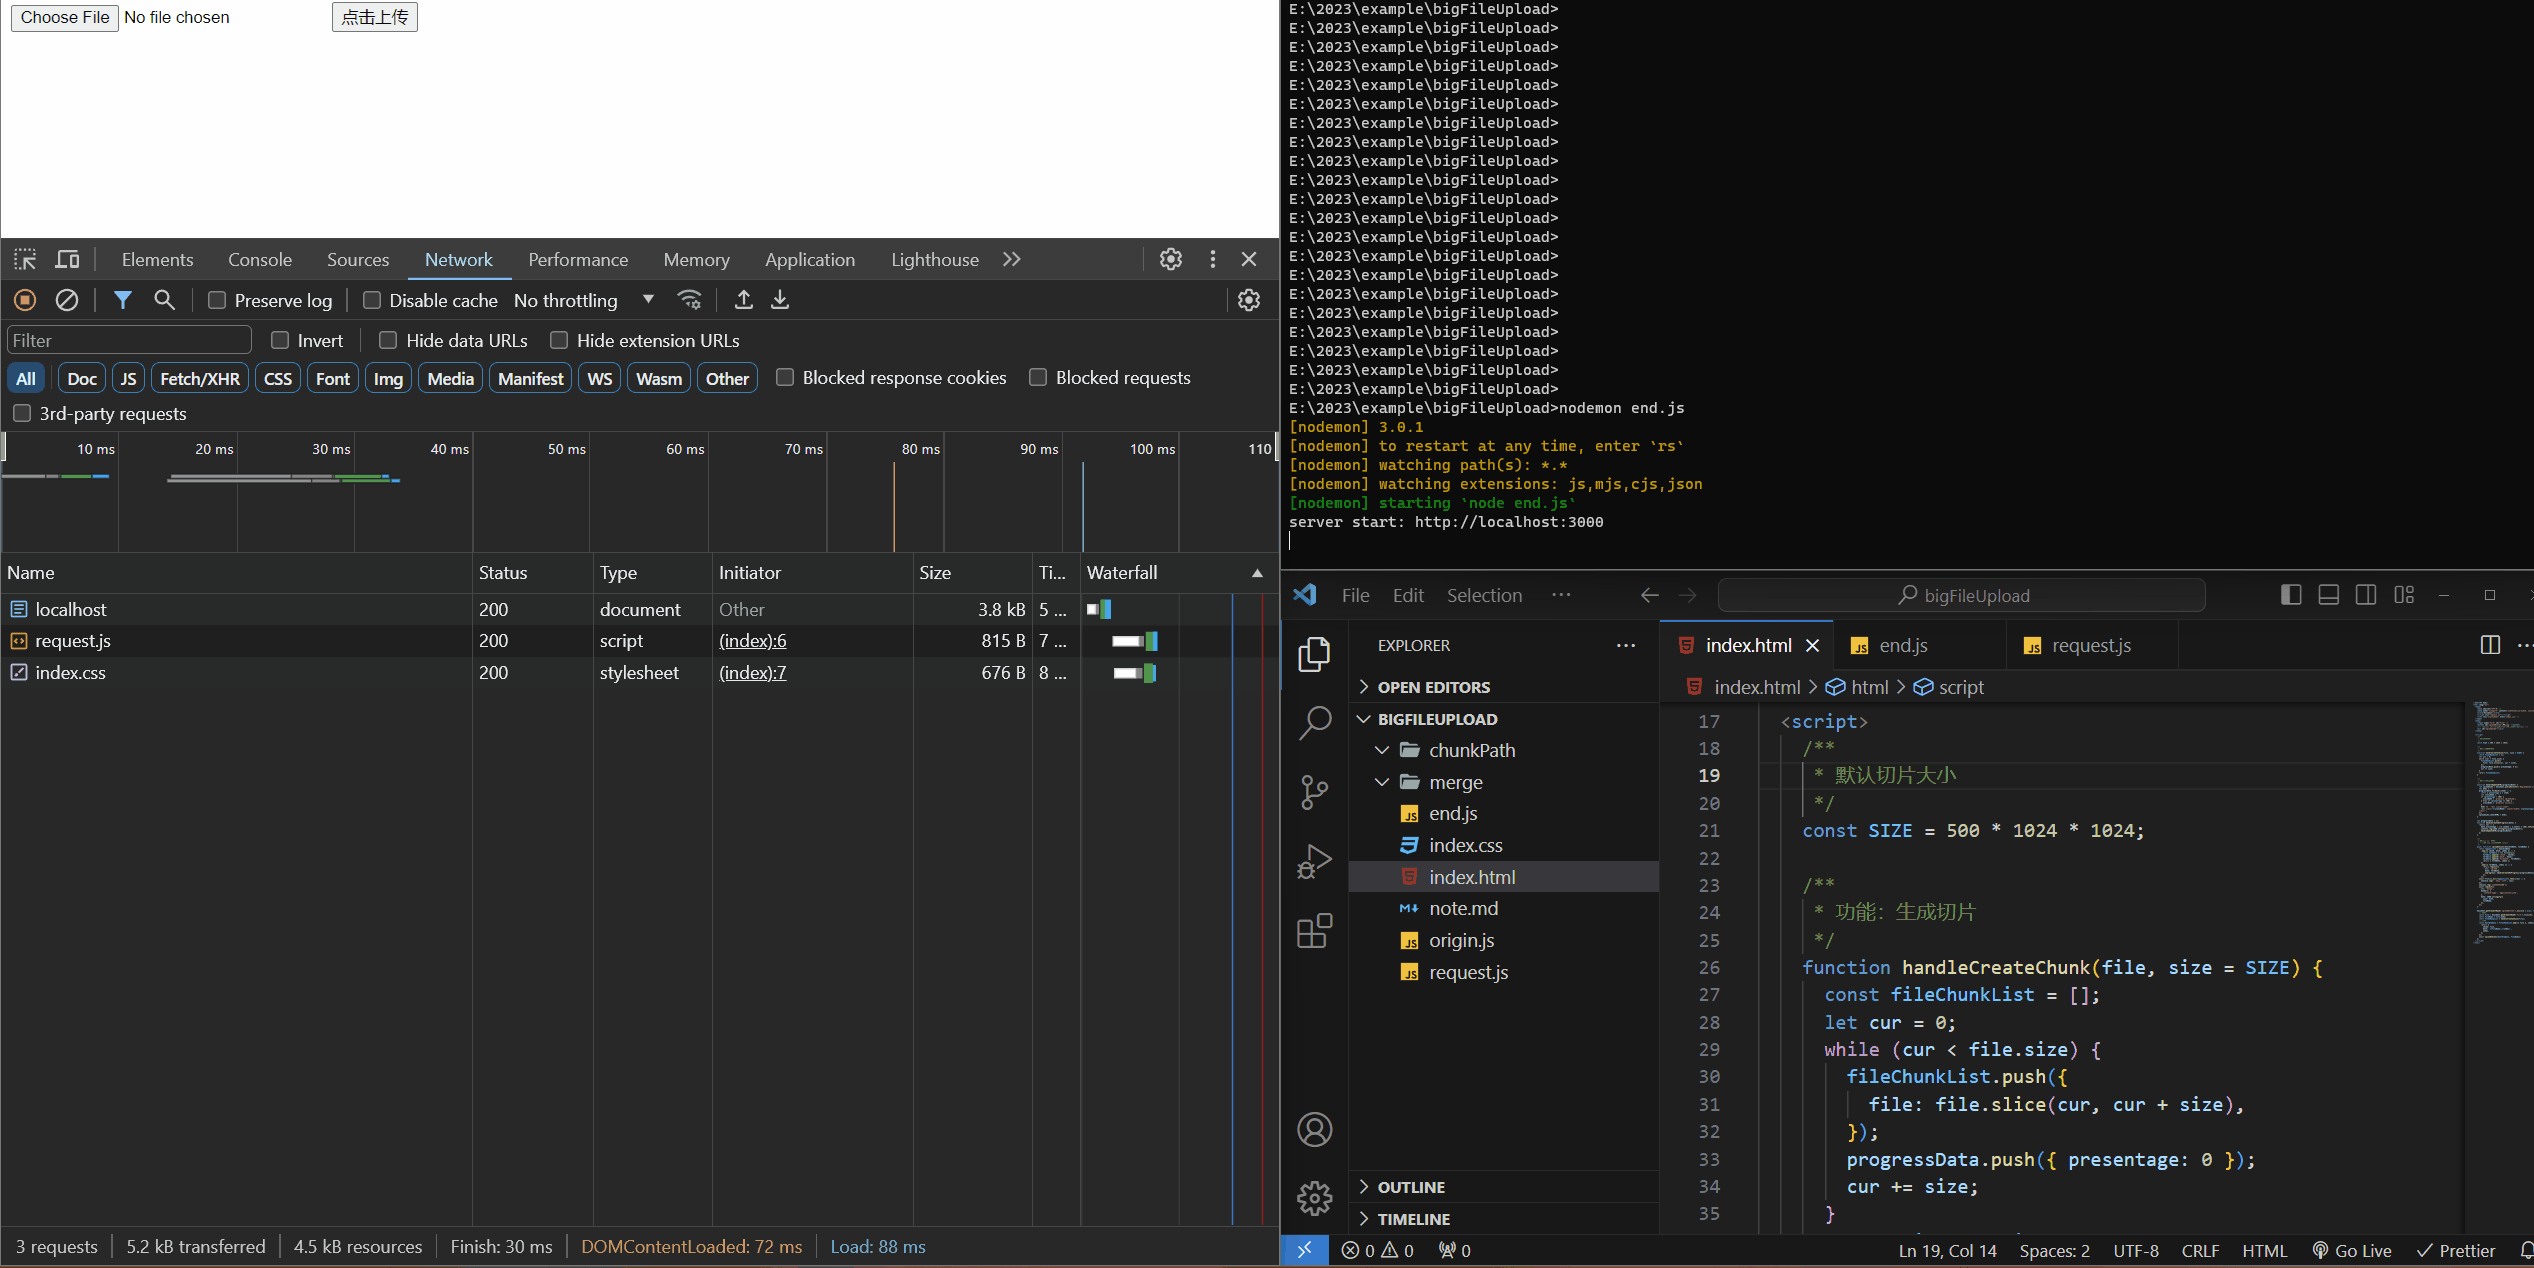
# 分片(500MB)进度效果展示
效果展示,一个分片是 500MB 的
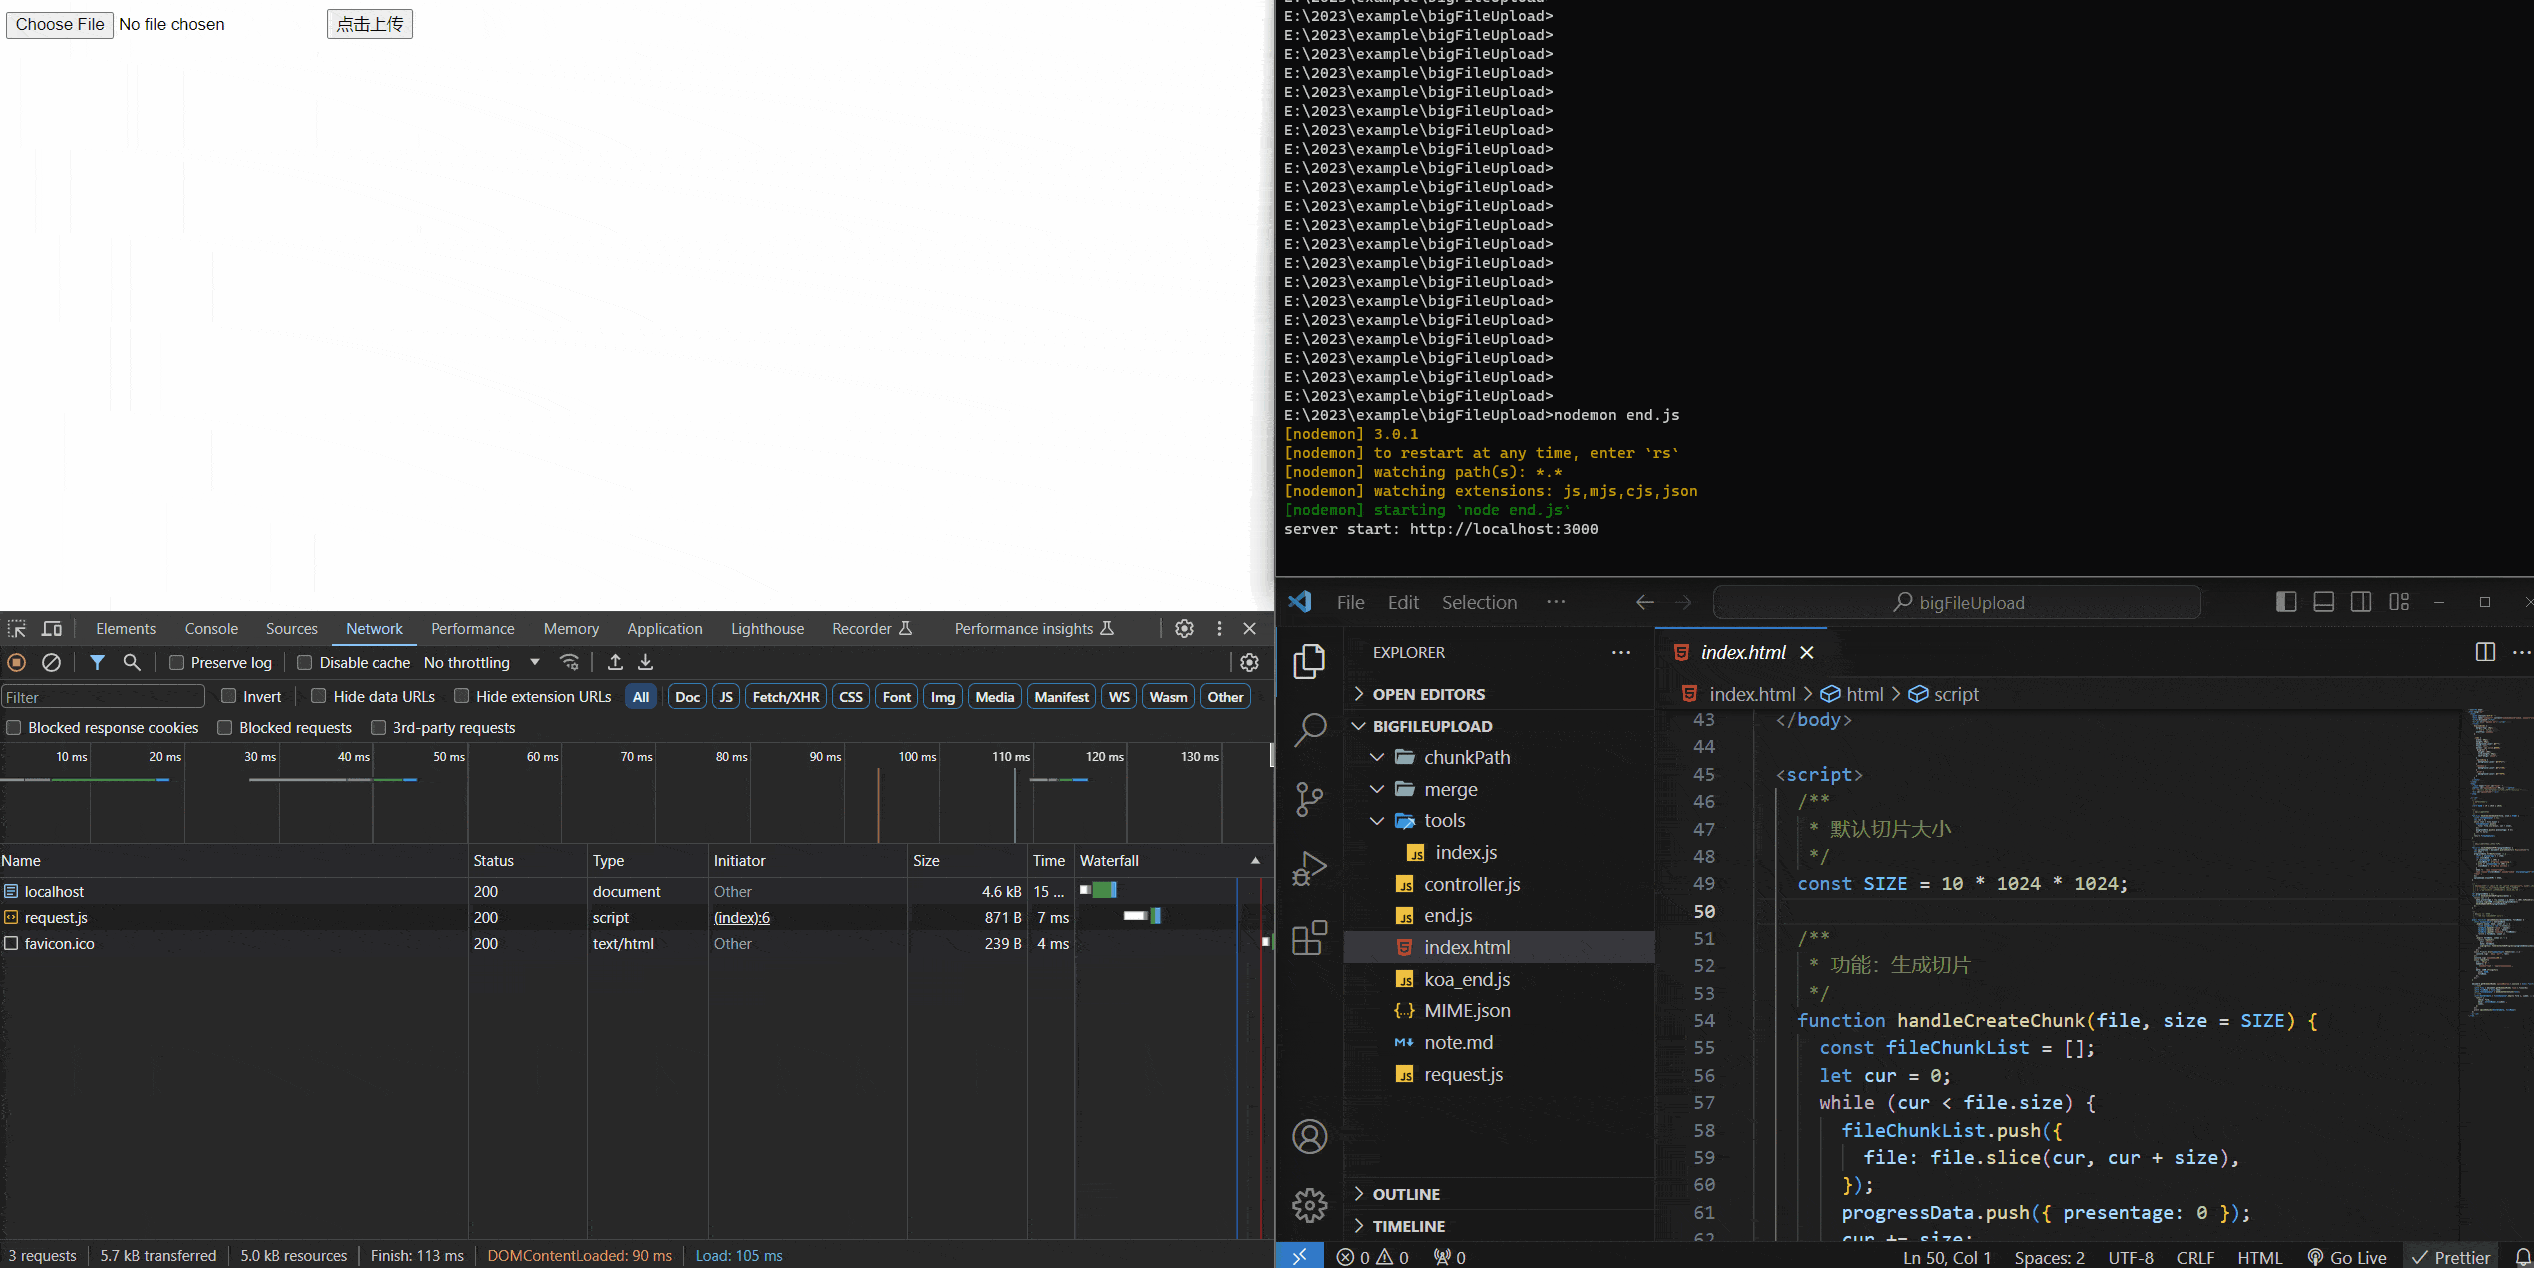
分片(10MB)进度效果展示
大文件分片上传效果展示
前端
思路
前端的思路:将大文件切分成多个小文件,然后并发给后端。
页面构建
先在页面上写几个组件用来获取文件。
1
2
3
4
| <body>
<input type="file" id="file" />
<button id="uploadButton">点击上传</button>
</body>
|
功能函数:生成切片
切分文件的核心函数是 slice,没错,就是这么的神奇啊
我们把切好的 chunk 放到数组里,等待下一步的包装处理
1
2
3
4
5
6
7
8
9
10
11
12
13
14
15
16
17
18
19
20
|
const SIZE = 10 * 1024 * 1024;
function handleCreateChunk(file, size = SIZE) {
const fileChunkList = [];
progressData = [];
let cur = 0;
while (cur < file.size) {
fileChunkList.push({
file: file.slice(cur, cur + size),
});
cur += size;
}
return fileChunkList;
}
|
功能函数:请求逻辑
在这里简单封装一下 XMLHttpRequest
1
2
3
4
5
6
7
8
9
10
11
12
13
14
15
16
17
18
19
20
|
function request({ url, method = 'post', data, header = {}, requestList }) {
return new Promise((resolve, reject) => {
let xhr = new XMLHttpRequest();
xhr.open(method, url);
Object.keys(header).forEach((item) => {
xhr.setRequestHeader(item, header[item]);
});
xhr.onloadend = function (e) {
resolve({
data: e.target.response,
});
};
xhr.send(data);
});
}
|
功能函数:上传切片
1
2
3
4
5
6
7
8
9
10
11
12
13
14
15
16
17
18
19
20
21
22
23
24
25
26
27
28
29
30
31
32
33
34
35
36
37
38
39
40
41
42
|
async function uploadChunks(hanldleData, fileName) {
const requestList = hanldleData
.map(({ chunk, hash }) => {
const formData = new FormData();
formData.append('chunk', chunk);
formData.append('hash', hash);
formData.append('filename', fileName);
return formData;
})
.map((formData) => {
request({
url: 'upload',
data: formData,
});
});
await Promise.all(requestList);
}
document.getElementById('uploadButton').onclick = async function () {
const file = document.getElementById('file').files[0];
console.log(file);
const fileName = file.name;
const fileChunkList = handleCreateChunk(file);
const hanldleData = fileChunkList.map(({ file }, index) => {
return {
chunk: file,
hash: `${fileName}_${index}`,
};
});
await uploadChunks(hanldleData, fileName);
};
|
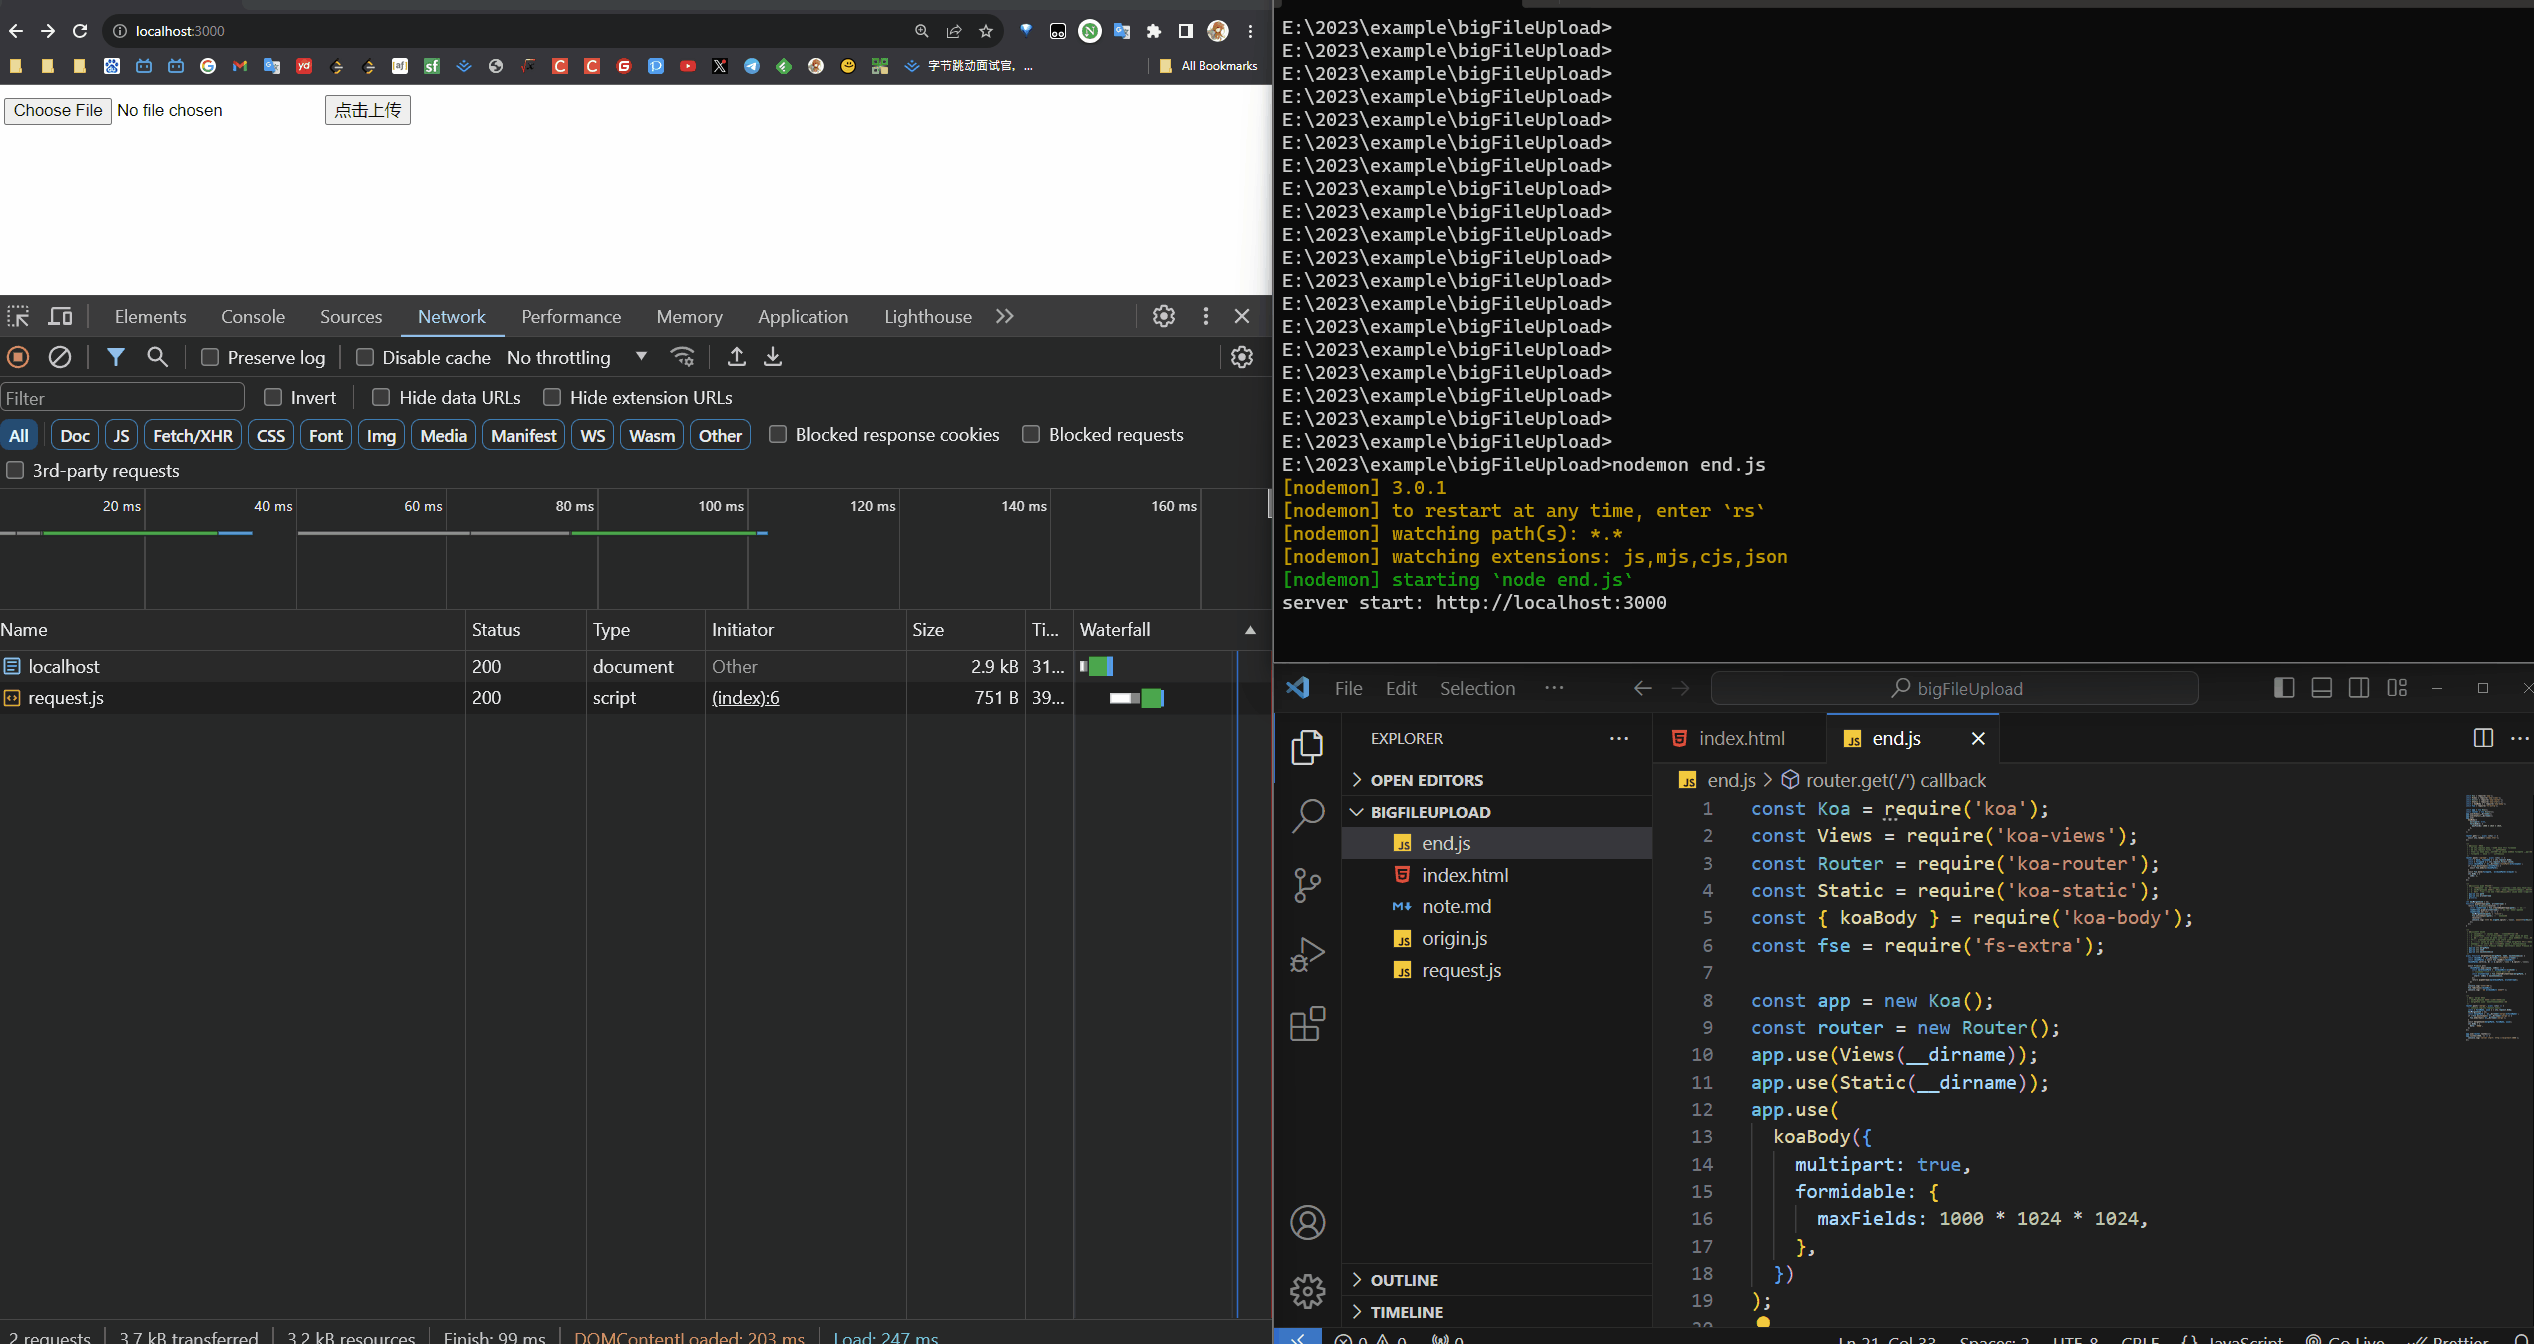
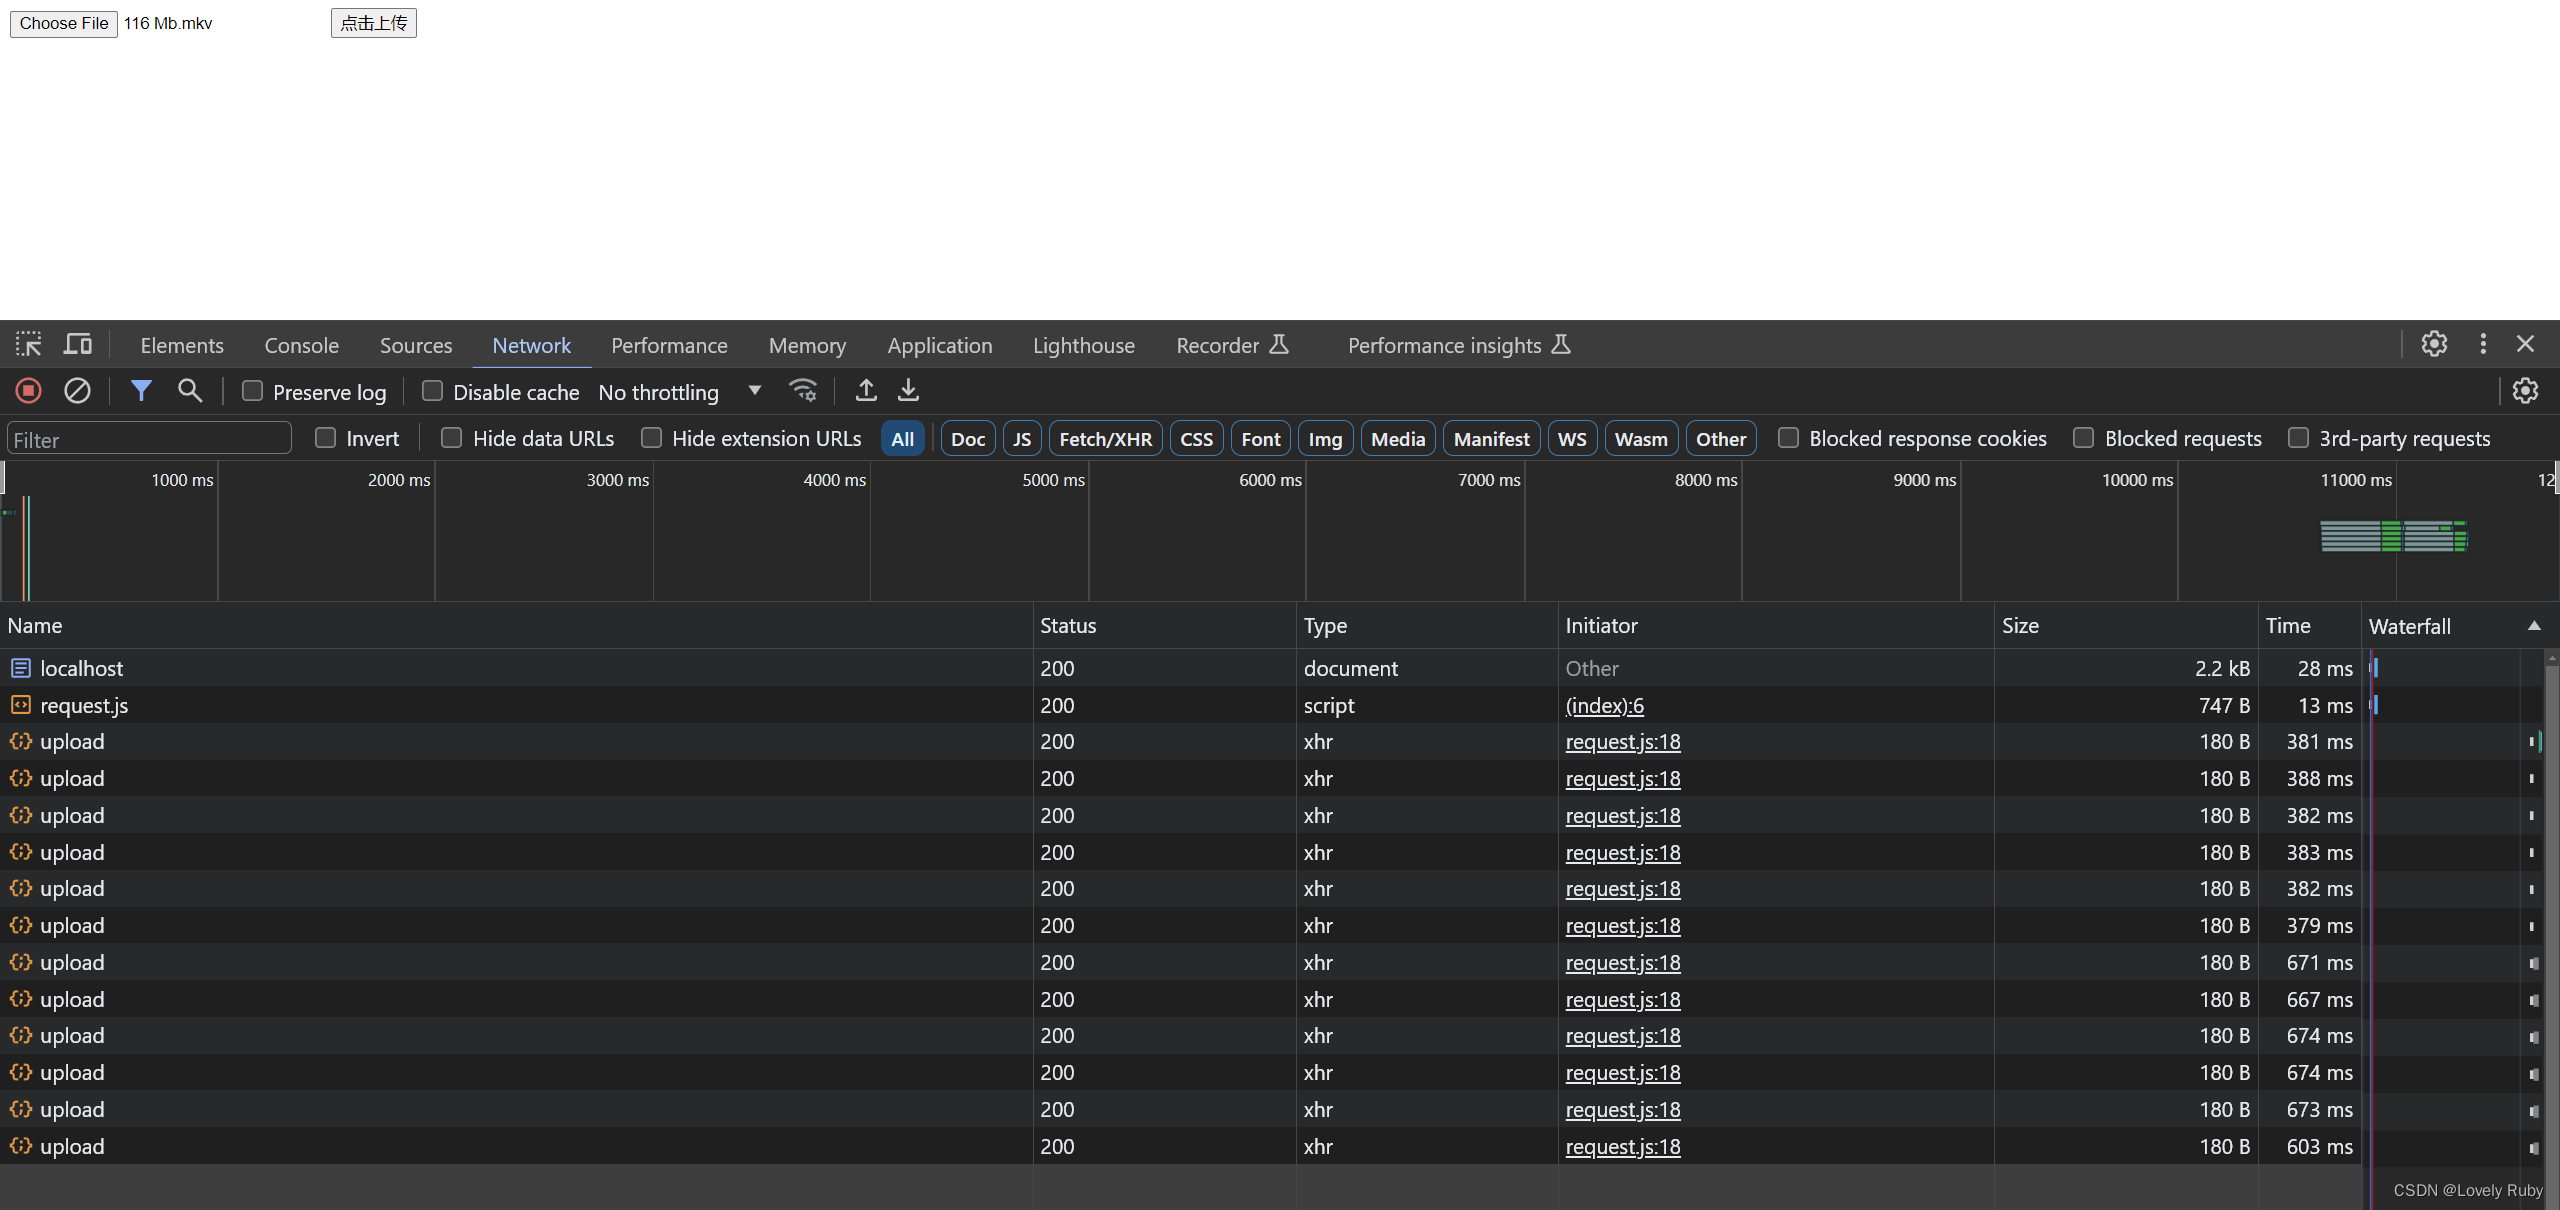
可以在请求中看到有很多个请求并发的上传
优化:进度条的生成
自己简单撸了几个 cube 进度条
1
2
3
4
5
6
7
8
9
10
11
12
13
14
15
16
17
18
19
20
21
22
23
24
25
26
27
28
29
30
31
32
33
34
| <style>
#uploadCube {
margin-top: 10px;
overflow: hidden;
}
.cube {
width: 50px;
height: 50px;
background-color: #fff;
float: left;
border: 1px solid #000;
.progress {
height: 100%;
line-height: 50px;
text-align: center;
}
.uploading {
background-color: #409eff;
}
.success {
background-color: #51f400;
}
.error {
background-color: #ff9090;
}
}
</style>
<body>
<input type="file" id="file" />
<button id="uploadButton">点击上传</button>
<div id="uploadCube"></div>
</body>
|
1
2
3
4
5
6
7
8
9
10
11
12
13
14
15
16
17
18
19
20
21
22
23
24
25
26
27
28
29
30
31
32
33
34
|
function handleUpdateHTML(progressData) {
let uploadCube = document.querySelector('#uploadCube');
let html = '';
progressData.forEach((item) => {
const { presentage } = item;
let className = '';
if (presentage < 100) {
className = 'progress uploading';
} else if (presentage == 100) {
className = 'progress success';
}
html += ` <div class="cube">
<div class="${className}" style="width: ${presentage}%">${presentage}%</div>
</div>`;
});
uploadCube.innerHTML = html;
}
let progressData = [];
function handleCreateOnProgress(data) {
return (e) => {
data.presentage = ((e.loaded / e.total) * 100).toFixed(2);
console.log(JSON.stringify(progressData));
handleUpdateHTML(progressData);
};
}
|
后端 (Koa)
后端的思路是:
- 把 Node 暂存的
chunk 文件转移到我想处理的地方(也可以直接处理,看你的)
- 创建写入流,把各个
chunk 合并,前端会给你每个 chunk 的大小,还有 hash 值来定位每个 chunk 的位置
获取 chunk 切片文件
先把上传的接口写好
1
2
3
4
5
6
7
8
9
10
11
12
13
14
15
16
17
18
19
20
21
22
23
24
25
26
27
28
29
30
31
32
33
34
35
36
37
38
39
40
41
42
43
44
45
46
47
48
49
| const Koa = require('koa');
const Views = require('koa-views');
const Router = require('koa-router');
const Static = require('koa-static');
const { koaBody } = require('koa-body');
const fs = require('fs');
const fse = require('fs-extra');
const app = new Koa();
const router = new Router();
app.use(Views(__dirname));
app.use(Static(__dirname));
app.use(
koaBody({
multipart: true,
formidable: {
maxFields: 1000 * 1024 * 1024,
},
})
);
router.get('/', async (ctx) => {
await ctx.render('index.html');
});
router.post('/upload', async (ctx) => {
const { hash, filename } = ctx.request.body;
const { filepath } = ctx.request.files?.chunk;
const chunkPath = `${__dirname}/chunkPath/${filename}`;
if (!fse.existsSync(chunkPath)) {
await fse.mkdirs(chunkPath);
}
await fse.move(filepath, `${chunkPath}/${hash}`);
ctx.body = {
code: 1,
};
});
app.use(router.routes());
app.listen(3000, () => {
console.log(`server start: http://localhost:3000`);
});
|
写完这些就可以拿到 chunk

合并接口
先写一个接口,用来拿到 hash、文件名
1
2
3
4
5
6
7
8
9
10
11
12
13
14
15
16
17
18
|
router.post('/merge', async (ctx) => {
const { fileName, size } = ctx.request.body;
hasMergeChunk = {};
const mergePath = `${__dirname}/merge/${fileName}`;
if (!fse.existsSync(`${__dirname}/merge`)) {
fse.mkdirSync(`${__dirname}/merge`);
}
await mergeChunk(mergePath, fileName, size);
ctx.body = {
data: '成功',
};
});
|
合并分片的功能函数
然后开始合并
1
2
3
4
5
6
7
8
9
10
11
12
13
14
15
16
17
18
19
20
21
22
23
24
25
26
27
28
29
30
|
async function mergeChunk(mergePath, name, eachChunkSize) {
const chunkDir = `${__dirname}/chunkPath/${name}`;
const chunkPaths = await fse.readdir(chunkDir);
chunkPaths.sort((a, b) => a.split('_')[1] - b.split('_')[1]);
await Promise.all(
chunkPaths.map((chunk, index) => {
const eachChunkPath = `${chunkDir}/${chunk}`;
const writeStream = fse.createWriteStream(mergePath, {
start: index * eachChunkSize,
});
return pipeStream(eachChunkPath, writeStream);
})
);
console.log('合并完成');
fse.rmdirSync(chunkDir);
console.log(`删除 ${chunkDir} 文件夹`);
}
|
接着就是写入流
1
2
3
4
5
6
7
8
9
10
11
12
13
14
15
16
17
18
19
20
21
22
|
let hasMergeChunk = {};
function pipeStream(path, writeStream) {
return new Promise((resolve) => {
const readStream = fse.createReadStream(path);
readStream.pipe(writeStream);
readStream.on('end', () => {
hasMergeChunk[path] = 'finish';
fse.unlinkSync(path);
resolve();
console.log(`合并 No.${path.split('_')[1]}, 已经合并${Object.keys(hasMergeChunk).length}`);
});
});
}
|
至此一个基本的逻辑上传就做好了!
后端 (Node 原生)
想了想还是有必要用原生写一下 ,复习一下。
基础:搭建简单的服务
先写一个基本的服务框架
1
2
3
4
5
6
7
8
9
10
11
12
13
14
15
16
| const http = require('http');
const server = http.createServer();
server.on('request', async (req, res) => {
res.setHeader('Access-Control-Allow-Origin', '*');
res.setHeader('Access-Control-Allow-Headers', '*');
if (req.method === 'OPTION') {
res.status = 200;
res.end();
return;
}
res.end('hello node');
});
const POST = 3000;
server.listen(POST, null, null, () => {
console.log(`server start: http://localhost:${POST}`);
});
|
基础:资源返回
添加页面的返回,以及资源的返回
1
2
3
4
5
6
7
8
9
10
11
12
13
14
15
16
17
18
19
20
21
22
23
24
25
26
27
28
29
30
31
32
33
34
35
36
37
38
39
40
41
42
43
| const http = require('http');
const server = http.createServer();
const url = require('url');
const fs = require('fs');
const path = require('path');
const MIME = require('./mime.json');
server.on('request', async (req, res) => {
res.setHeader('Access-Control-Allow-Origin', '*');
res.setHeader('Access-Control-Allow-Headers', '*');
res.setHeader('content-type', 'text/html;charset=utf-8');
if (req.method === 'OPTION') {
res.status = 200;
res.end();
return;
}
let { pathname } = url.parse(req.url);
console.log(`进入${pathname}`);
switch (pathname) {
case '/':
case '/index': {
let rs = fs.createReadStream('./index.html');
rs.pipe(res);
break;
}
case '/favicon.ico': {
res.end('我没有哦');
break;
}
default: {
let ext = path.extname(pathname);
res.setHeader('Content-Type', MIME[ext]);
let rs = fs.createReadStream(`.${pathname}`);
rs.pipe(res);
}
}
});
const POST = 3000;
server.listen(POST, null, null, () => {
console.log(`server start: http://localhost:${POST}`);
});
|
MIME.json 在这个文章的最底下, 或者可以自己找个更全的。
功能:上传接口
接着写上传的接口,这里参考大圣老师的代码,写一个类来收集方法。
类定义如下,新建一个文件 controller.js:
1
2
3
4
5
6
7
8
9
10
11
12
13
14
15
16
17
18
19
20
21
22
23
24
25
26
27
28
29
30
31
32
33
34
35
36
37
38
39
40
|
const multiparty = require('multiparty');
const fse = require('fs-extra');
class Controller {
constructor(dirPath) {
this.chunkPath = dirPath;
}
async handleUpload(req, res) {
const _this = this;
const form = new multiparty.Form();
form.parse(req, async function (err, fields, files) {
if (err) {
console.log(err);
return;
}
const [chunk] = files.chunk;
const [hash] = fields.hash;
const [filename] = fields.filename;
const chunkFileDirPath = `${_this.chunkPath}/${filename}`;
if (!fse.existsSync(chunkFileDirPath)) {
await fse.mkdirs(chunkFileDirPath);
}
await fse.move(chunk?.path, `${chunkFileDirPath}/${hash}`);
res.end('收到文件 chunks');
});
}
}
module.exports = Controller;
|
然后在主服务里引入这个类,再上传接口这里调用一下类方法。
1
2
3
4
5
6
7
8
9
|
const Controller = require('./controller');
const UPLOAD_DIR = `${__dirname}/chunkPath`;
const controller = new Controller(UPLOAD_DIR);
case '/upload': {
await controller.handleUpload(req, res);
break;
}
|

功能:写合并接口
合并的逻辑跟 Koa 几乎没什么差别,只不过我都把方法封装到类里了。
首先写路由
1
2
3
4
| case '/merge': {
await controller.handleMerge(req, res);
break;
}
|
然后在类中定义合并的方法
1
2
3
4
5
6
7
8
9
10
11
12
13
14
15
16
17
18
19
20
21
22
23
24
25
26
27
|
async handleMerge(req, res) {
const postData = await handlePostData(req);
const { fileName, size: eachChunkSize } = postData;
const mergePath = `${__dirname}/merge`;
const mergeFilePath = `${__dirname}/merge/${fileName}`;
if (!fse.existsSync(mergePath)) {
fse.mkdirSync(mergePath);
}
const mergeOptions = { chunksPath: this.chunksPath, mergeFilePath, fileName, eachChunkSize };
await handleMergeChunks(mergeOptions);
console.log('Success Merge');
res.end(
JSON.stringify({
code: 1,
message: 'success merge',
})
);
}
|
这里的 POST 请求需要处理一下
1
2
3
4
5
6
7
8
9
10
11
12
13
14
15
16
17
18
19
20
21
22
23
24
25
|
function handlePostData(req) {
return new Promise((resolve, reject) => {
let allData = '';
let i = 0;
req.on('data', function (chunkData) {
allData += chunkData;
});
req.on('end', function () {
const POST_MESSAGE = JSON.parse(allData);
resolve(POST_MESSAGE);
});
});
}
|
然后就是合并 chunks,具体的注释我都放到代码里了
1
2
3
4
5
6
7
8
9
10
11
12
13
14
15
16
17
18
19
20
21
22
23
24
25
26
|
async function handleMergeChunks({ chunksPath, mergeFilePath, fileName, eachChunkSize }) {
hasMergeChunk = {};
const fileChunksDir = `${chunksPath}/${fileName}`;
const fileAllChunksPaths = await fse.readdir(fileChunksDir);
console.log(fileAllChunksPaths);
fileAllChunksPaths.sort((a, b) => a.split('_')[1] - b.split('_')[1]);
const promiseArray = fileAllChunksPaths.map((chunk, index, array) => {
const eachChunkPath = `${fileChunksDir}/${chunk}`;
const writeStream = fse.createWriteStream(mergeFilePath, {
start: index * eachChunkSize,
});
return pipeStream(eachChunkPath, writeStream, array.length);
});
await Promise.all(promiseArray);
}
|
把创建写文件流功能也拆分出来。不了解流的概念的话,首先了解一下什么是输入可读流。
1
2
3
4
5
6
7
8
9
10
11
12
13
14
15
16
17
18
19
20
21
22
23
24
25
|
let hasMergeChunk = {};
function pipeStream(path, writeStream, length) {
return new Promise((resolve) => {
const readStream = fse.createReadStream(path);
readStream.pipe(writeStream);
readStream.on('end', function () {
hasMergeChunk[path] = 'finished';
fse.unlinkSync(path);
resolve();
console.log(
`doing: No.${path.split('_')[1]} progress: [ ${Object.keys(hasMergeChunk).length} / ${length} ]`
);
});
});
}
|
结语
真的只是收藏不点赞嘛…
上传还有合并这两大功能基本上也就完成啦!觉得有用的话,请点个赞吧~谢谢吴彦祖们!!!

参考文章
- 字节跳动面试官:请你实现一个大文件上传和断点续传
- 字节跳动面试官,我也实现了大文件上传和断点续传
Q & A
Q: 发送片段之后的合并可能出现错误
这个情况分析了一下是前端的锅啊,前端的 await Promise.all() 并不能保证后端的文件流都写完了。
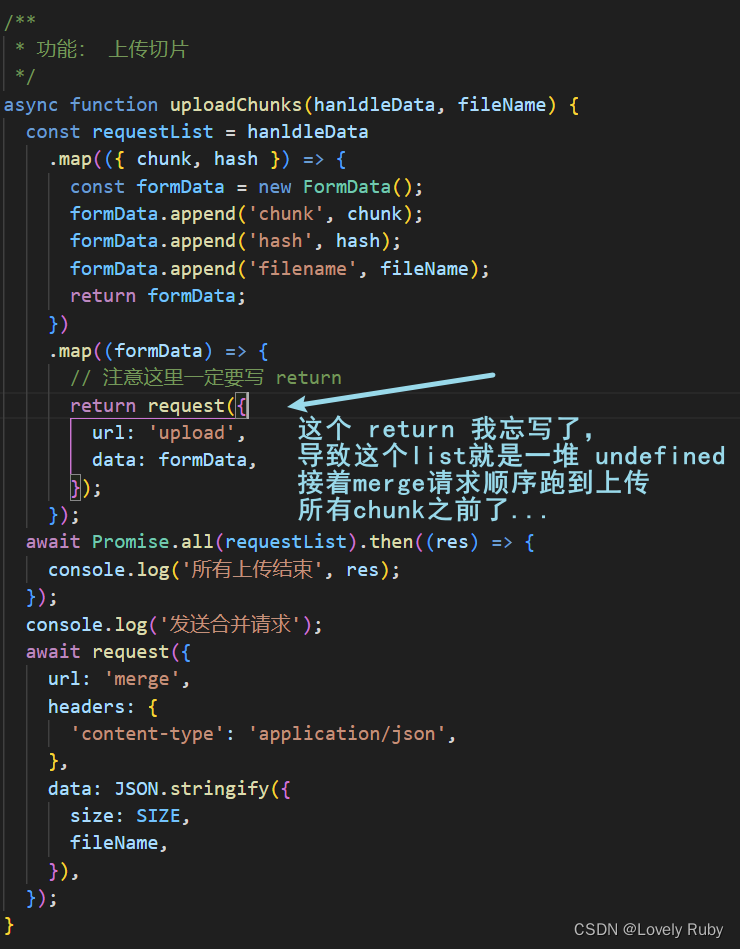
Q: 进度条直接从 0 到了 100
我发现我的请求写错了

完整代码
前端
1
2
3
4
5
6
7
8
9
10
11
12
13
14
15
16
17
18
19
20
21
22
23
24
25
26
27
28
29
30
31
32
33
34
35
36
37
38
39
40
41
42
43
44
45
46
47
48
49
50
51
52
53
54
55
56
57
58
59
60
61
62
63
64
65
66
67
68
69
70
71
72
73
74
75
76
77
78
79
80
81
82
83
84
85
86
87
88
89
90
91
92
93
94
95
96
97
98
99
100
101
102
103
104
105
106
107
108
109
110
111
112
113
114
115
116
117
118
119
120
121
122
123
124
125
126
127
128
129
130
131
132
133
134
135
136
137
138
139
140
141
142
143
144
145
146
147
148
149
150
151
152
153
154
155
156
| <!DOCTYPE html>
<html lang="en">
<head>
<meta charset="UTF-8" />
<meta name="viewport" content="width=device-width, initial-scale=1.0" />
<title>Document</title>
<script src="request.js"></script>
<style>
#uploadCube {
margin-top: 10px;
overflow: hidden;
}
.cube {
width: 50px;
height: 50px;
background-color: #fff;
float: left;
border: 1px solid #000;
.progress {
height: 100%;
line-height: 50px;
text-align: center;
}
.uploading {
background-color: #409eff;
}
.success {
background-color: #51f400;
}
.error {
background-color: #ff9090;
}
}
</style>
</head>
<body>
<input type="file" id="file" />
<button id="uploadButton">点击上传</button>
<div id="uploadCube"></div>
</body>
<script>
const SIZE = 10 * 1024 * 1024;
function handleCreateChunk(file, size = SIZE) {
const fileChunkList = [];
progressData = [];
let cur = 0;
while (cur < file.size) {
fileChunkList.push({
file: file.slice(cur, cur + size),
});
progressData.push({ presentage: 0 });
cur += size;
}
return fileChunkList;
}
function handleUpdateHTML(progressData) {
let uploadCube = document.querySelector('#uploadCube');
let html = '';
progressData.forEach((item) => {
const { presentage } = item;
let className = '';
if (presentage < 100) {
className = 'progress uploading';
} else if (presentage == 100) {
className = 'progress success';
}
html += ` <div class="cube">
<div class="${className}" style="width: ${presentage}%">${presentage}%</div>
</div>`;
});
uploadCube.innerHTML = html;
}
let progressData = [];
function handleCreateOnProgress(data) {
return (e) => {
data.presentage = ((e.loaded / e.total) * 100).toFixed(2);
console.log(JSON.stringify(progressData));
handleUpdateHTML(progressData);
};
}
async function uploadChunks(hanldleData, fileName) {
const requestList = hanldleData
.map(({ chunk, hash, index }) => {
const formData = new FormData();
formData.append('chunk', chunk);
formData.append('hash', hash);
formData.append('filename', fileName);
return { formData, index };
})
.map(({ formData, index }) => {
return request({
url: 'upload',
data: formData,
onprogress: handleCreateOnProgress(progressData[index]),
});
});
await Promise.all(requestList).then((res) => {
console.log('所有上传结束', res);
});
console.log('发送合并请求');
await request({
url: 'merge',
headers: {
'content-type': 'application/json',
},
data: JSON.stringify({
size: SIZE,
fileName,
}),
});
}
document.getElementById('uploadButton').onclick = async function () {
const file = document.getElementById('file').files[0];
const fileName = file.name;
const fileChunkList = handleCreateChunk(file);
const hanldleData = fileChunkList.map(({ file }, index) => {
return {
chunk: file,
hash: `${fileName}_${index}`,
index,
};
});
await uploadChunks(hanldleData, fileName);
};
</script>
</html>
|
后端 Koa
1
2
3
4
5
6
7
8
9
10
11
12
13
14
15
16
17
18
19
20
21
22
23
24
25
26
27
28
29
30
31
32
33
34
35
36
37
38
39
40
41
42
43
44
45
46
47
48
49
50
51
52
53
54
55
56
57
58
59
60
61
62
63
64
65
66
67
68
69
70
71
72
73
74
75
76
77
78
79
80
81
82
83
84
85
86
87
88
89
90
91
92
93
94
95
96
97
98
99
100
101
102
103
104
105
106
107
108
109
110
111
112
113
114
115
116
117
118
119
120
121
122
123
| const Koa = require('koa');
const Views = require('koa-views');
const Router = require('koa-router');
const Static = require('koa-static');
const { koaBody } = require('koa-body');
const fse = require('fs-extra');
const app = new Koa();
const router = new Router();
app.use(Views(__dirname));
app.use(Static(__dirname));
app.use(
koaBody({
multipart: true,
formidable: {
maxFileSize: 1000 * 1024 * 1024,
},
})
);
router.get('/', async (ctx) => {
await ctx.render('index.html');
});
router.post('/upload', async (ctx) => {
const { hash, filename } = ctx.request.body;
const { filepath } = ctx.request.files?.chunk;
const chunkPath = `${__dirname}/chunkPath/${filename}`;
if (!fse.existsSync(chunkPath)) {
await fse.mkdirs(chunkPath);
}
await fse.move(filepath, `${chunkPath}/${hash}`);
ctx.body = {
code: 1,
};
});
let hasMergeChunk = {};
function pipeStream(path, writeStream) {
return new Promise((resolve) => {
const readStream = fse.createReadStream(path);
readStream.pipe(writeStream);
readStream.on('end', () => {
hasMergeChunk[path] = 'finish';
fse.unlinkSync(path);
resolve();
console.log(`合并 No.${path.split('_')[1]}, 已经合并${Object.keys(hasMergeChunk).length}`);
});
});
}
async function mergeChunk(mergePath, name, eachChunkSize) {
const chunkDir = `${__dirname}/chunkPath/${name}`;
const chunkPaths = await fse.readdir(chunkDir);
chunkPaths.sort((a, b) => a.split('_')[1] - b.split('_')[1]);
await Promise.all(
chunkPaths.map((chunk, index) => {
const eachChunkPath = `${chunkDir}/${chunk}`;
const writeStream = fse.createWriteStream(mergePath, {
start: index * eachChunkSize,
});
return pipeStream(eachChunkPath, writeStream);
})
);
console.log('合并完成');
fse.rmdirSync(chunkDir);
console.log(`删除 ${chunkDir} 文件夹`);
}
router.post('/merge', async (ctx) => {
const { fileName, size } = ctx.request.body;
hasMergeChunk = {};
const mergePath = `${__dirname}/merge/${fileName}`;
if (!fse.existsSync(`${__dirname}/merge`)) {
fse.mkdirSync(`${__dirname}/merge`);
}
await mergeChunk(mergePath, fileName, size);
ctx.body = {
data: '成功',
};
});
app.use(router.routes());
app.listen(3000, () => {
console.log(`server start: http://localhost:3000`);
});
|
request.js 的封装
1
2
3
4
5
6
7
8
9
10
11
12
13
14
15
16
17
18
19
20
21
22
|
function request({ url, method = 'post', data, headers = {}, onprogress = (e) => e, requestList }) {
return new Promise((resolve, reject) => {
let xhr = new XMLHttpRequest();
xhr.open(method, url);
Object.keys(headers).forEach((item) => {
xhr.setRequestHeader(item, headers[item]);
});
xhr.upload.onprogress = onprogress;
xhr.onloadend = function (e) {
resolve({
data: e.target.response,
});
};
xhr.send(data);
});
}
|
后端原生
主服务
1
2
3
4
5
6
7
8
9
10
11
12
13
14
15
16
17
18
19
20
21
22
23
24
25
26
27
28
29
30
31
32
33
34
35
36
37
38
39
40
41
42
43
44
45
46
47
48
49
50
51
52
53
54
| const http = require('http');
const server = http.createServer();
const url = require('url');
const fs = require('fs');
const path = require('path');
const MIME = require('./mime.json');
const Controller = require('./controller');
const UPLOAD_DIR = `${__dirname}/chunkPath`;
const controller = new Controller(UPLOAD_DIR);
server.on('request', async (req, res) => {
res.setHeader('Access-Control-Allow-Origin', '*');
res.setHeader('Access-Control-Allow-Headers', '*');
res.setHeader('content-type', 'text/html;charset=utf-8');
if (req.method === 'OPTION') {
res.status = 200;
res.end();
return;
}
let { pathname } = url.parse(req.url);
console.log(`进入${pathname}`);
switch (pathname) {
case '/':
case '/index': {
let rs = fs.createReadStream('./index.html');
rs.pipe(res);
break;
}
case '/upload': {
await controller.handleUpload(req, res);
break;
}
case '/merge': {
  await controller.handleMerge(req, res);
  break;
}
case '/favicon.ico': {
res.end('我没有哦');
break;
}
default: {
let ext = path.extname(pathname);
res.setHeader('Content-Type', MIME[ext]);
let rs = fs.createReadStream(`.${pathname}`);
rs.pipe(res);
}
}
});
const POST = 3000;
server.listen(POST, null, null, () => {
console.log(`server start: http://localhost:${POST}`);
});
|
类
1
2
3
4
5
6
7
8
9
10
11
12
13
14
15
16
17
18
19
20
21
22
23
24
25
26
27
28
29
30
31
32
33
34
35
36
37
38
39
40
41
42
43
44
45
46
47
48
49
50
51
52
53
54
55
56
57
58
59
60
61
62
63
64
65
66
67
68
69
|
const multiparty = require('multiparty');
const fse = require('fs-extra');
const { handlePostData, handleMergeChunks } = require('./tools');
class Controller {
constructor(dirPath) {
this.chunksPath = dirPath;
}
async handleMerge(req, res) {
const postData = await handlePostData(req);
const { fileName, size: eachChunkSize } = postData;
const mergePath = `${__dirname}/merge`;
const mergeFilePath = `${__dirname}/merge/${fileName}`;
if (!fse.existsSync(mergePath)) {
fse.mkdirSync(mergePath);
}
const mergeOptions = { chunksPath: this.chunksPath, mergeFilePath, fileName, eachChunkSize };
await handleMergeChunks(mergeOptions);
console.log('Success Merge');
res.end(
JSON.stringify({
code: 1,
message: 'success merge',
})
);
}
async handleUpload(req, res) {
const _this = this;
const form = new multiparty.Form();
form.parse(req, async function (err, fields, files) {
if (err) {
console.log(err);
return;
}
const [chunk] = files.chunk;
const [hash] = fields.hash;
const [filename] = fields.filename;
const chunkFileDirPath = `${_this.chunksPath}/${filename}`;
if (!fse.existsSync(chunkFileDirPath)) {
await fse.mkdirs(chunkFileDirPath);
}
await fse.move(chunk?.path, `${chunkFileDirPath}/${hash}`);
res.end('收到文件 chunks');
});
}
}
module.exports = Controller;
|
工具函数
1
2
3
4
5
6
7
8
9
10
11
12
13
14
15
16
17
18
19
20
21
22
23
24
25
26
27
28
29
30
31
32
33
34
35
36
37
38
39
40
41
42
43
44
45
46
47
48
49
50
51
52
53
54
55
56
57
58
59
60
61
62
63
64
65
66
67
68
69
70
71
72
73
74
75
76
77
78
79
80
81
82
83
84
85
86
87
88
89
|
const fse = require('fs-extra');
function handlePostData(req) {
return new Promise((resolve, reject) => {
let allData = '';
let i = 0;
req.on('data', function (chunkData) {
allData += chunkData;
});
req.on('end', function () {
const POST_MESSAGE = JSON.parse(allData);
resolve(POST_MESSAGE);
});
});
}
let hasMergeChunk = {};
function pipeStream(path, writeStream, length) {
return new Promise((resolve) => {
const readStream = fse.createReadStream(path);
readStream.pipe(writeStream);
readStream.on('end', function () {
hasMergeChunk[path] = 'finished';
fse.unlinkSync(path);
resolve();
const merging = path.split('_')[1];
const merged = Object.keys(hasMergeChunk).length;
console.log(`merging: No.${padS(merging)}. progress: [ ${padS(merged)} / ${padS(length)} ]`);
});
});
}
async function handleMergeChunks({ chunksPath, mergeFilePath, fileName, eachChunkSize }) {
hasMergeChunk = {};
const fileChunksDir = `${chunksPath}/${fileName}`;
const fileAllChunksPaths = await fse.readdir(fileChunksDir);
console.log(fileAllChunksPaths);
fileAllChunksPaths.sort((a, b) => a.split('_')[1] - b.split('_')[1]);
const promiseArray = fileAllChunksPaths.map((chunk, index, array) => {
const eachChunkPath = `${fileChunksDir}/${chunk}`;
const writeStream = fse.createWriteStream(mergeFilePath, {
start: index * eachChunkSize,
});
return pipeStream(eachChunkPath, writeStream, array.length);
});
await Promise.all(promiseArray);
}
module.exports = {
handlePostData,
handleMergeChunks,
};
|